

Cupcake Trivet DIY

Being a sewing studio, we have boxes full of scrap fabrics. It’s time to use them up! So we created this cute DIY project to share with all those who are sewing addicts like us, living with boxes of scraps fabrics.
P.S This is a great gift for your baking friends
PATTERN : Free Download here
What you will need:
Fabric: go through your scrap fabric box and pick out fabrics that are big enough for this project. Try to aim for cotton and avoid delicate fabrics such as silk or lace.
Batting: I used scrap fleece or sweater knit for this part. If you do have any, then you will need approximately ¼ yard of batting.
Heat n’ bond
Thread
Hand sewing needle

Cutting:
Cupcake top: cut 2 fabric, cut 2 batting
Cupcake bottom: cut 2 fabric, cut 2 batting
Eyes : cut 2 fabric, cut 2 heat n’ bond
Eyes twinkle: cut 2 fabric, cut 2 heat n’ bond
Mouth: cut 2 fabric, cut 2 heat n’ bond
Cheeks: cut 2 fabric, cut 2 heat n’ bond
Sewing instructions
**seam allowance is 3/8” or 0.5cm**

Step 1:
Place the right sides of the cupcake bottom fabric facing together, then place the batting on top of the wrong side of the fabric. Pin everything in place.

Step 2:
Stitch all around, just make sure you leave an opening at the top.
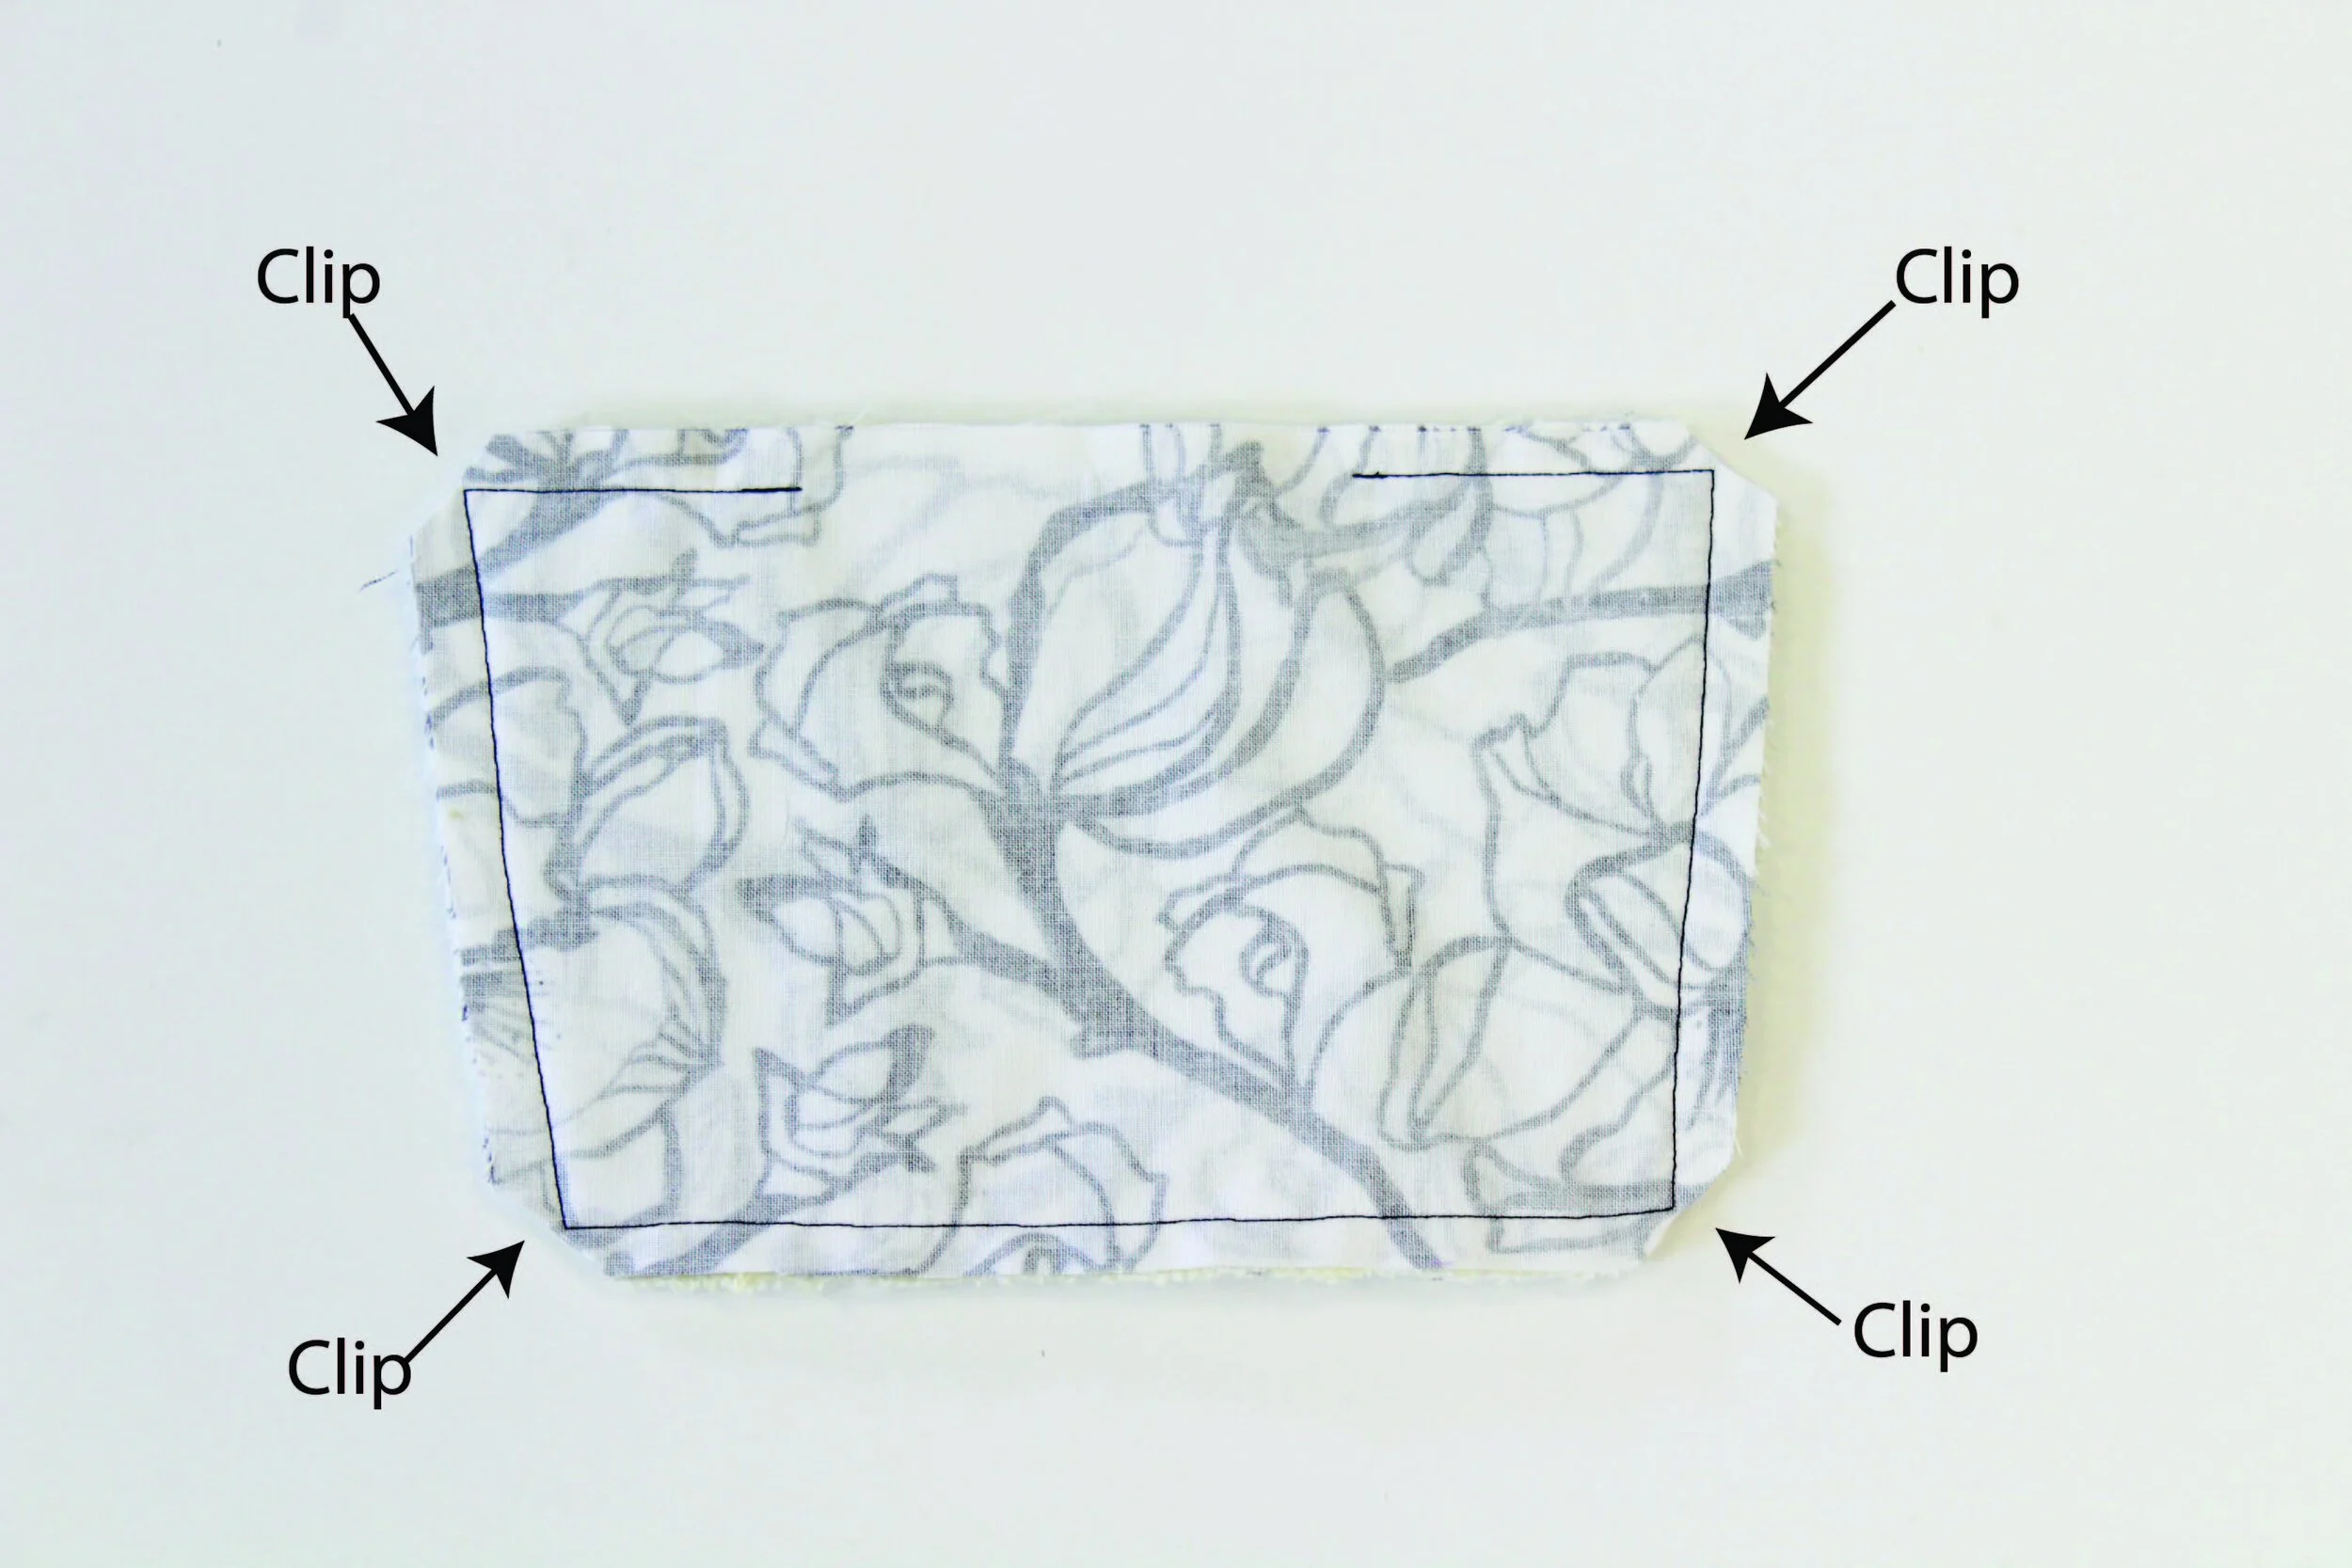
Step 3:
Clip the corners.

Step 4:
Turn the good side out.

Step 5:
Top stitch the lines on the cupcake bottom

Step 6:
Cupcake top: Place the right sides of the fabric facing together, then place the batting on top of the wrong side of the fabric, pin in place.

Step 7:
Stitch all around, make sure you leave an opening at the top

Step 8:
Trim all the seam allowance to approximately 1/8” and turn the right side out

Step 9:
Trim all the seam allowance to approximately 1/8” and turn the right side out

Step 10:
Place the cupcake bottom behind the cupcake top. Hand stitch the cupcake bottom to the cupcake top

Step 11:
You will want to hand stitch the cupcake top to the cupcake bottom on the front side

Step 12:
fuse the heat n’ bond to the face pieces and apply it to the cupcake bottom.
And you are done!!
Please feel free to share your finished work with us by tagging us at Instagram @sewbeitstudio