

Josy Lunch Bag DIY
It's time to upgrade your lunch routine! Say goodbye to plastic bags and make your own stylish lunch bag that will bring you joy every time you carry it.
What you will need :
1/2 yard of medium weight woven fabric
1/2 yard of light weight cotton for the lining
1/2 yard of thermal batting.
1 parachut buckle
1 yard of 1” wide webbing

Make the pattern
Follow the diagram measurement, and draft your pattern.

Cut 2 for the outside fabric

Cut 2 for the lining

Cut your thermal fleece bigger than your pattern.
Do not cut the thermal fleece the same size as your fabric.

Draw your stitch lines. Use chalk or non permanent markers.

Place the wrong side of the fabric on the batting.
I like the place the fabric on top of the fleece side.
Pin in place.

Stitch on the lines.

Trim off the batting.

It’s time to stitch the lunch bag front and back together.
Place the good sides of the fabrics together.

Stitch the 3 sides.
Seam allowance is 1/2”

Press the seam flat

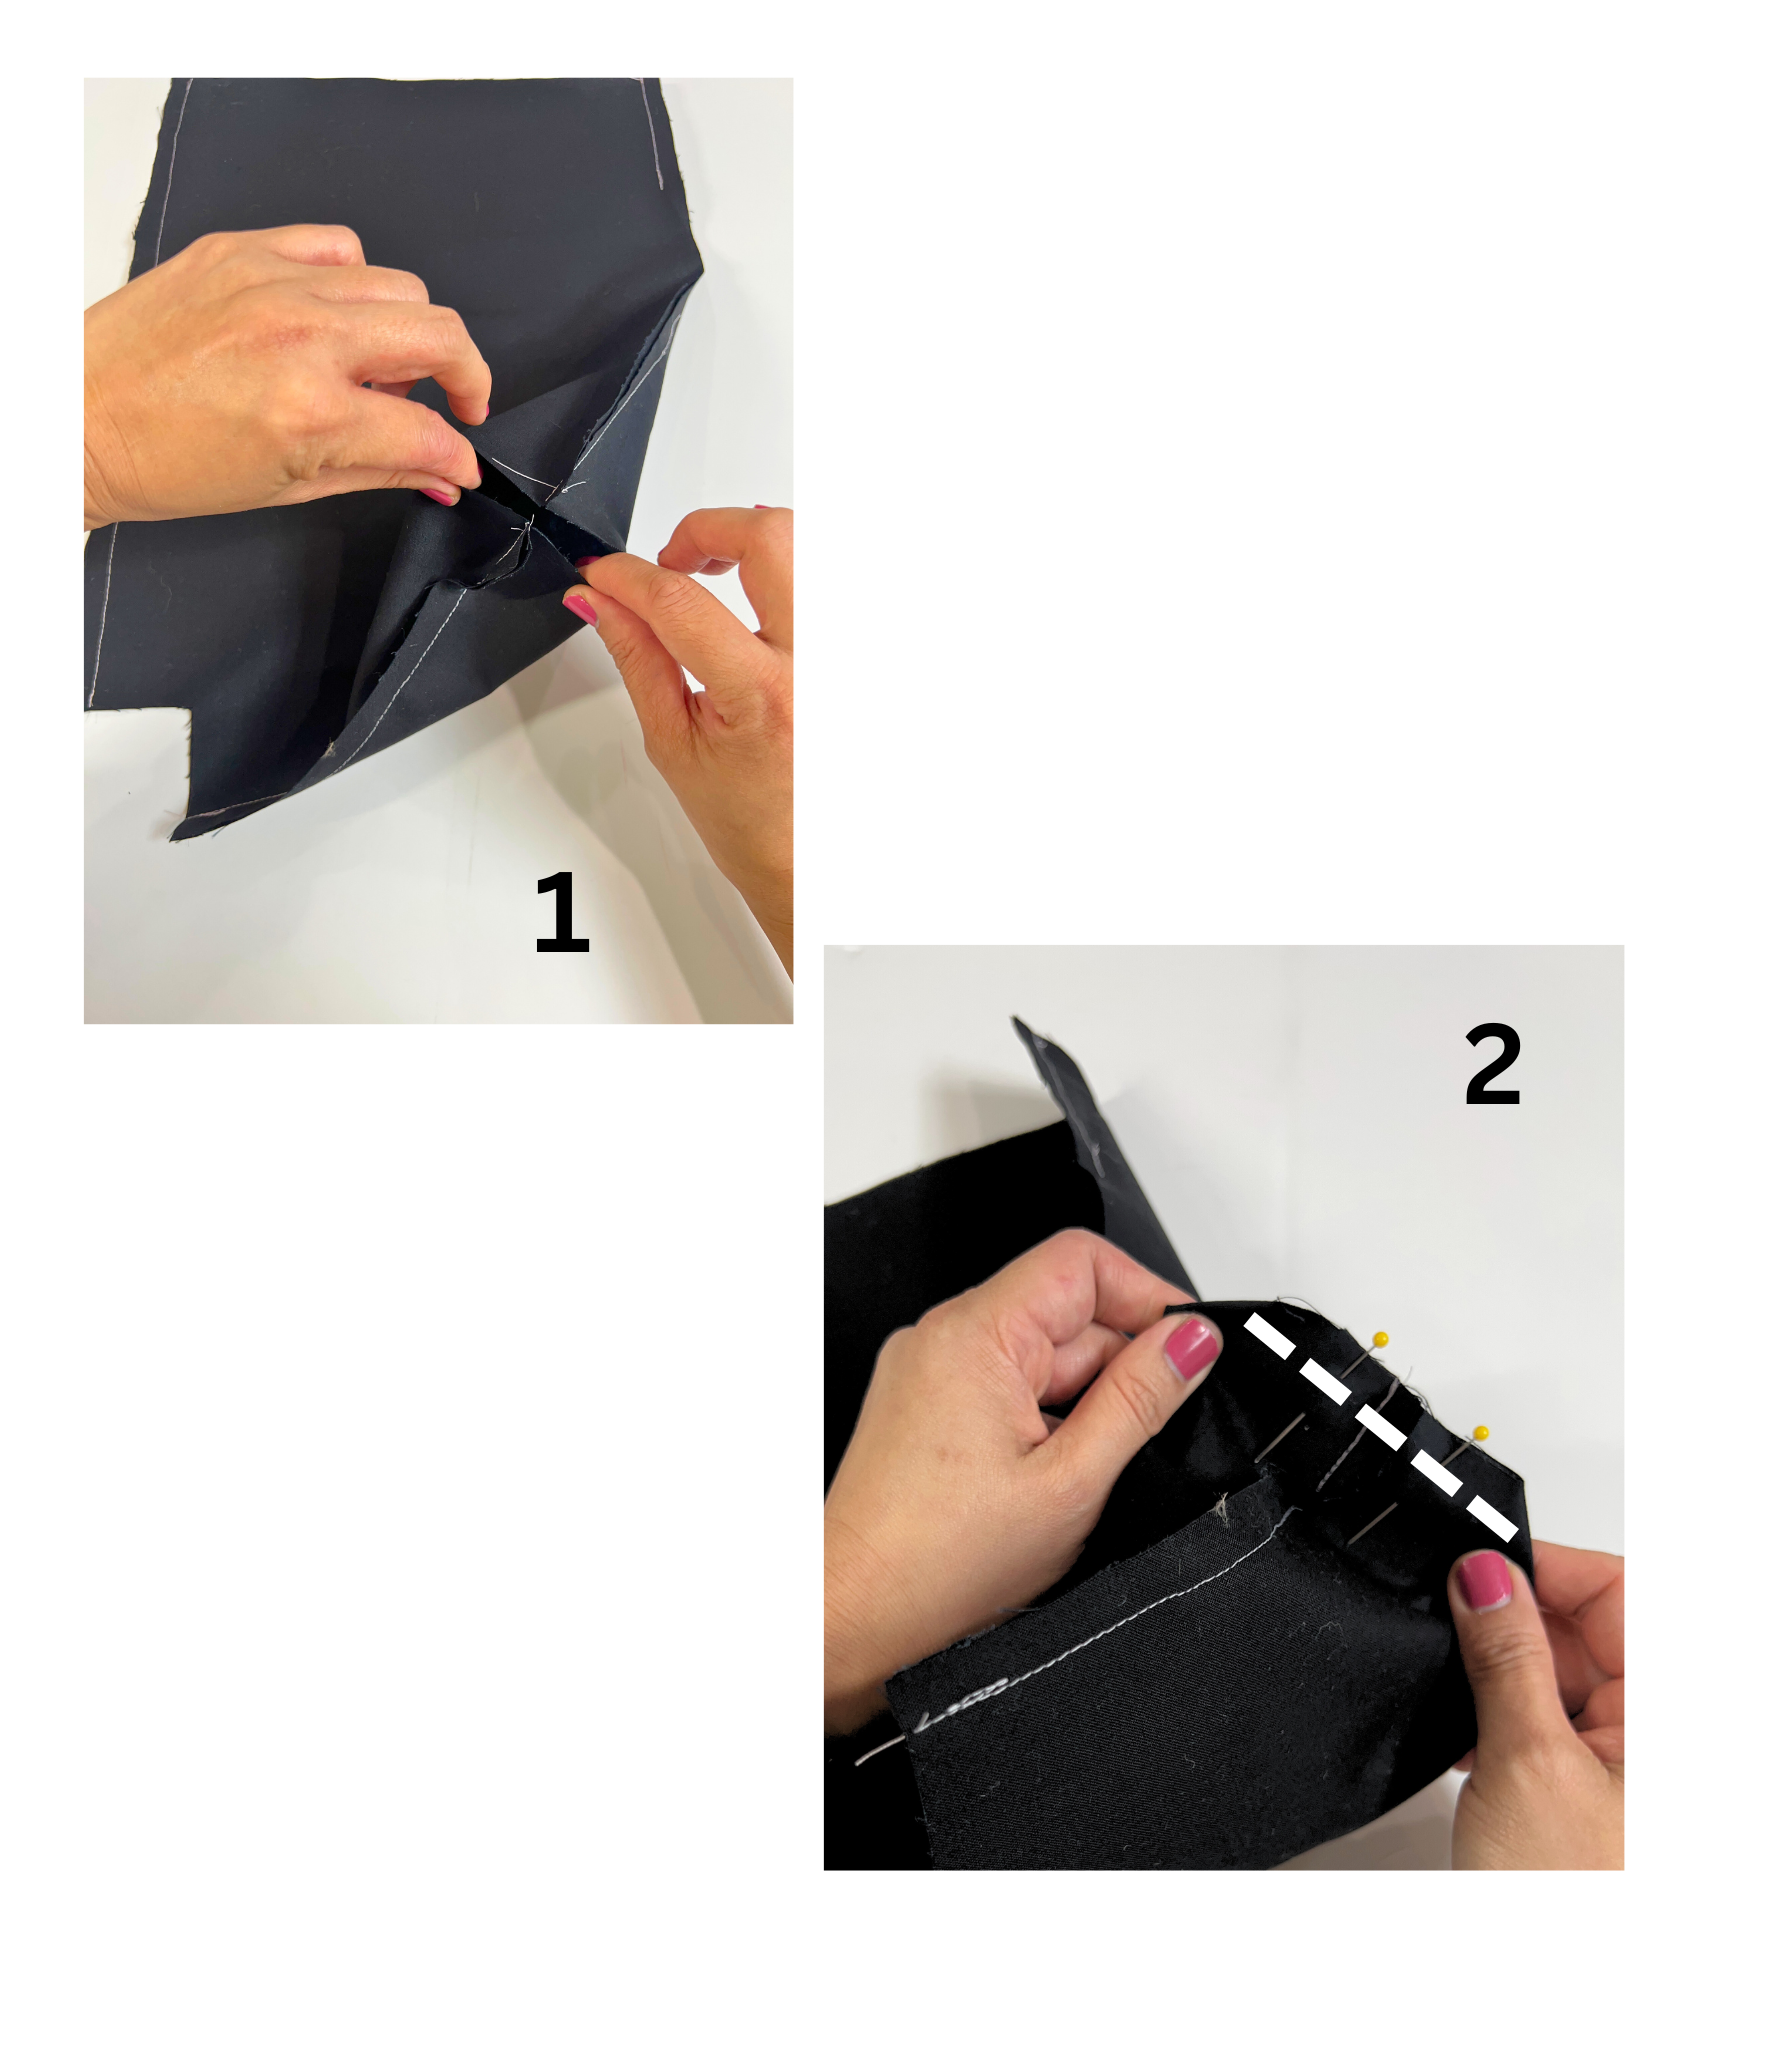
Make the box corner.
Step 1: open the corner
Step 2: fold the corner, so the two seams match up.
Step 3: Stitch. Seam allowance is 1/2”

Lining! Stitch the lining together, the two sides and the bottom.
Make sure you leave an opening on one of the sides.
Seam allowance is 1/2”
Make the lining’s box corner.

It’s time to attach the lunch bag outside and the lining together.
Step 1 : Make sure your lunch bag body has the good side out, and the lining has the wrong side out.
Step 2: insert the lunch bag body inside the lining.
Stitch the lunch bag body and lining together at top.
Seam allowanc is 1/2”

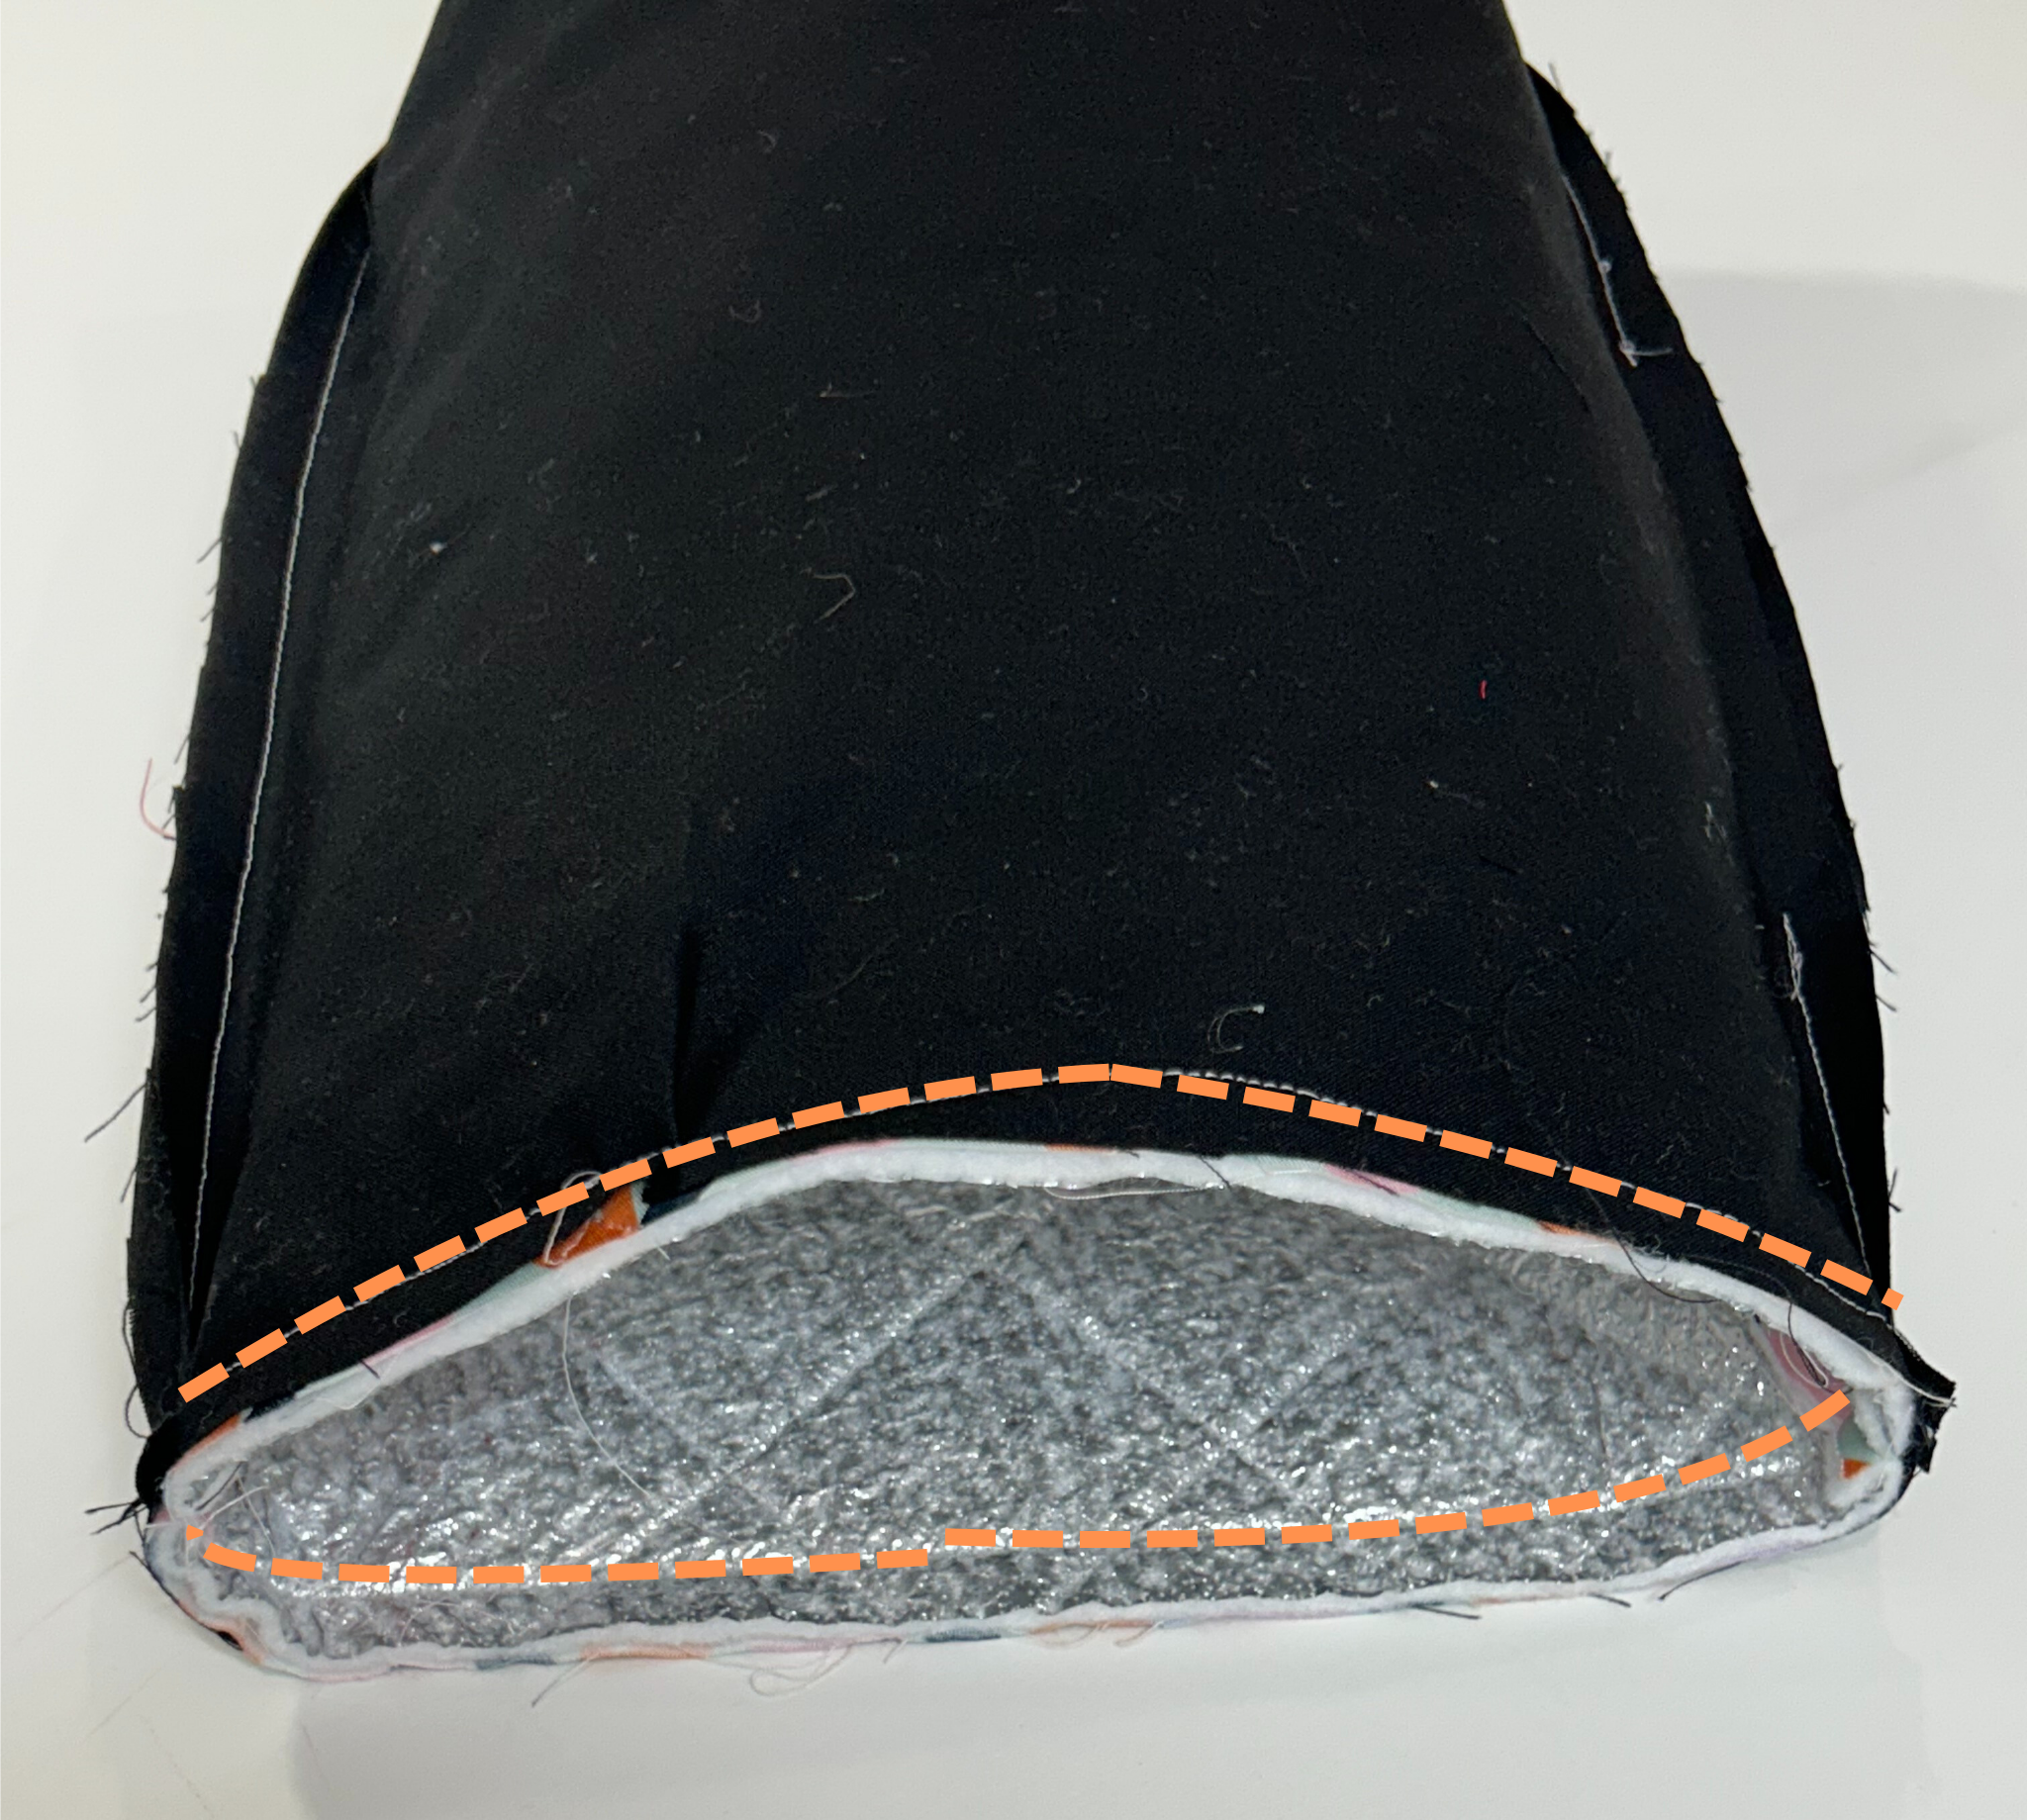
Trim the seam allowance to get rid of some of the bulkiness.
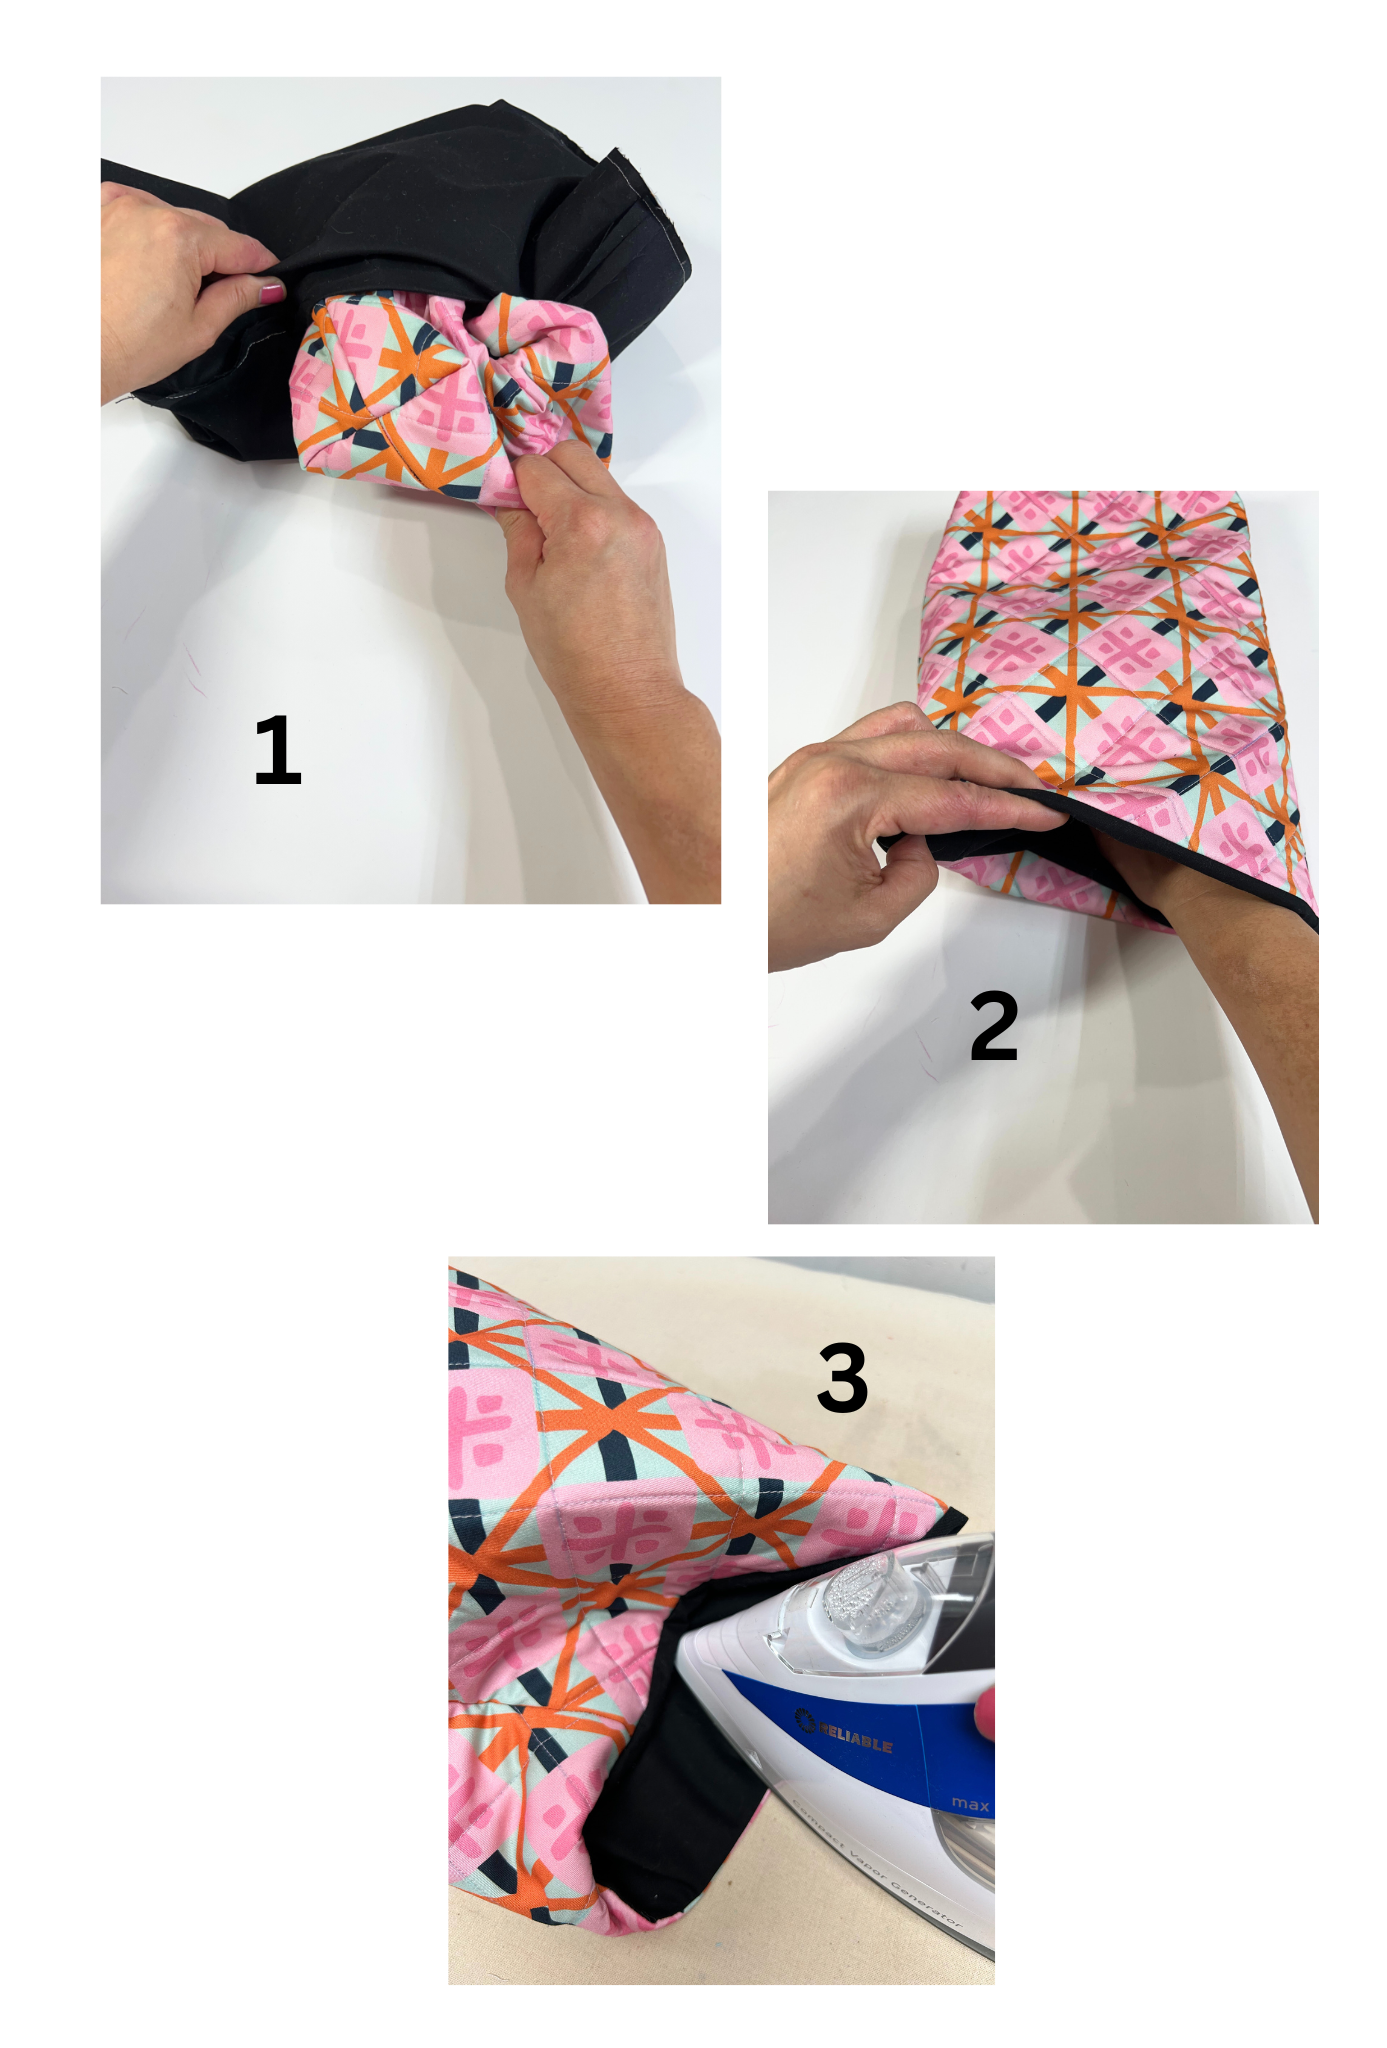
Step 1: pull the lunch bag out through the lining opening. Don’t forget to stitch the lining opening shut.
Step 2: push the lining inside the lunch bag
Step 3 : press the edge flat
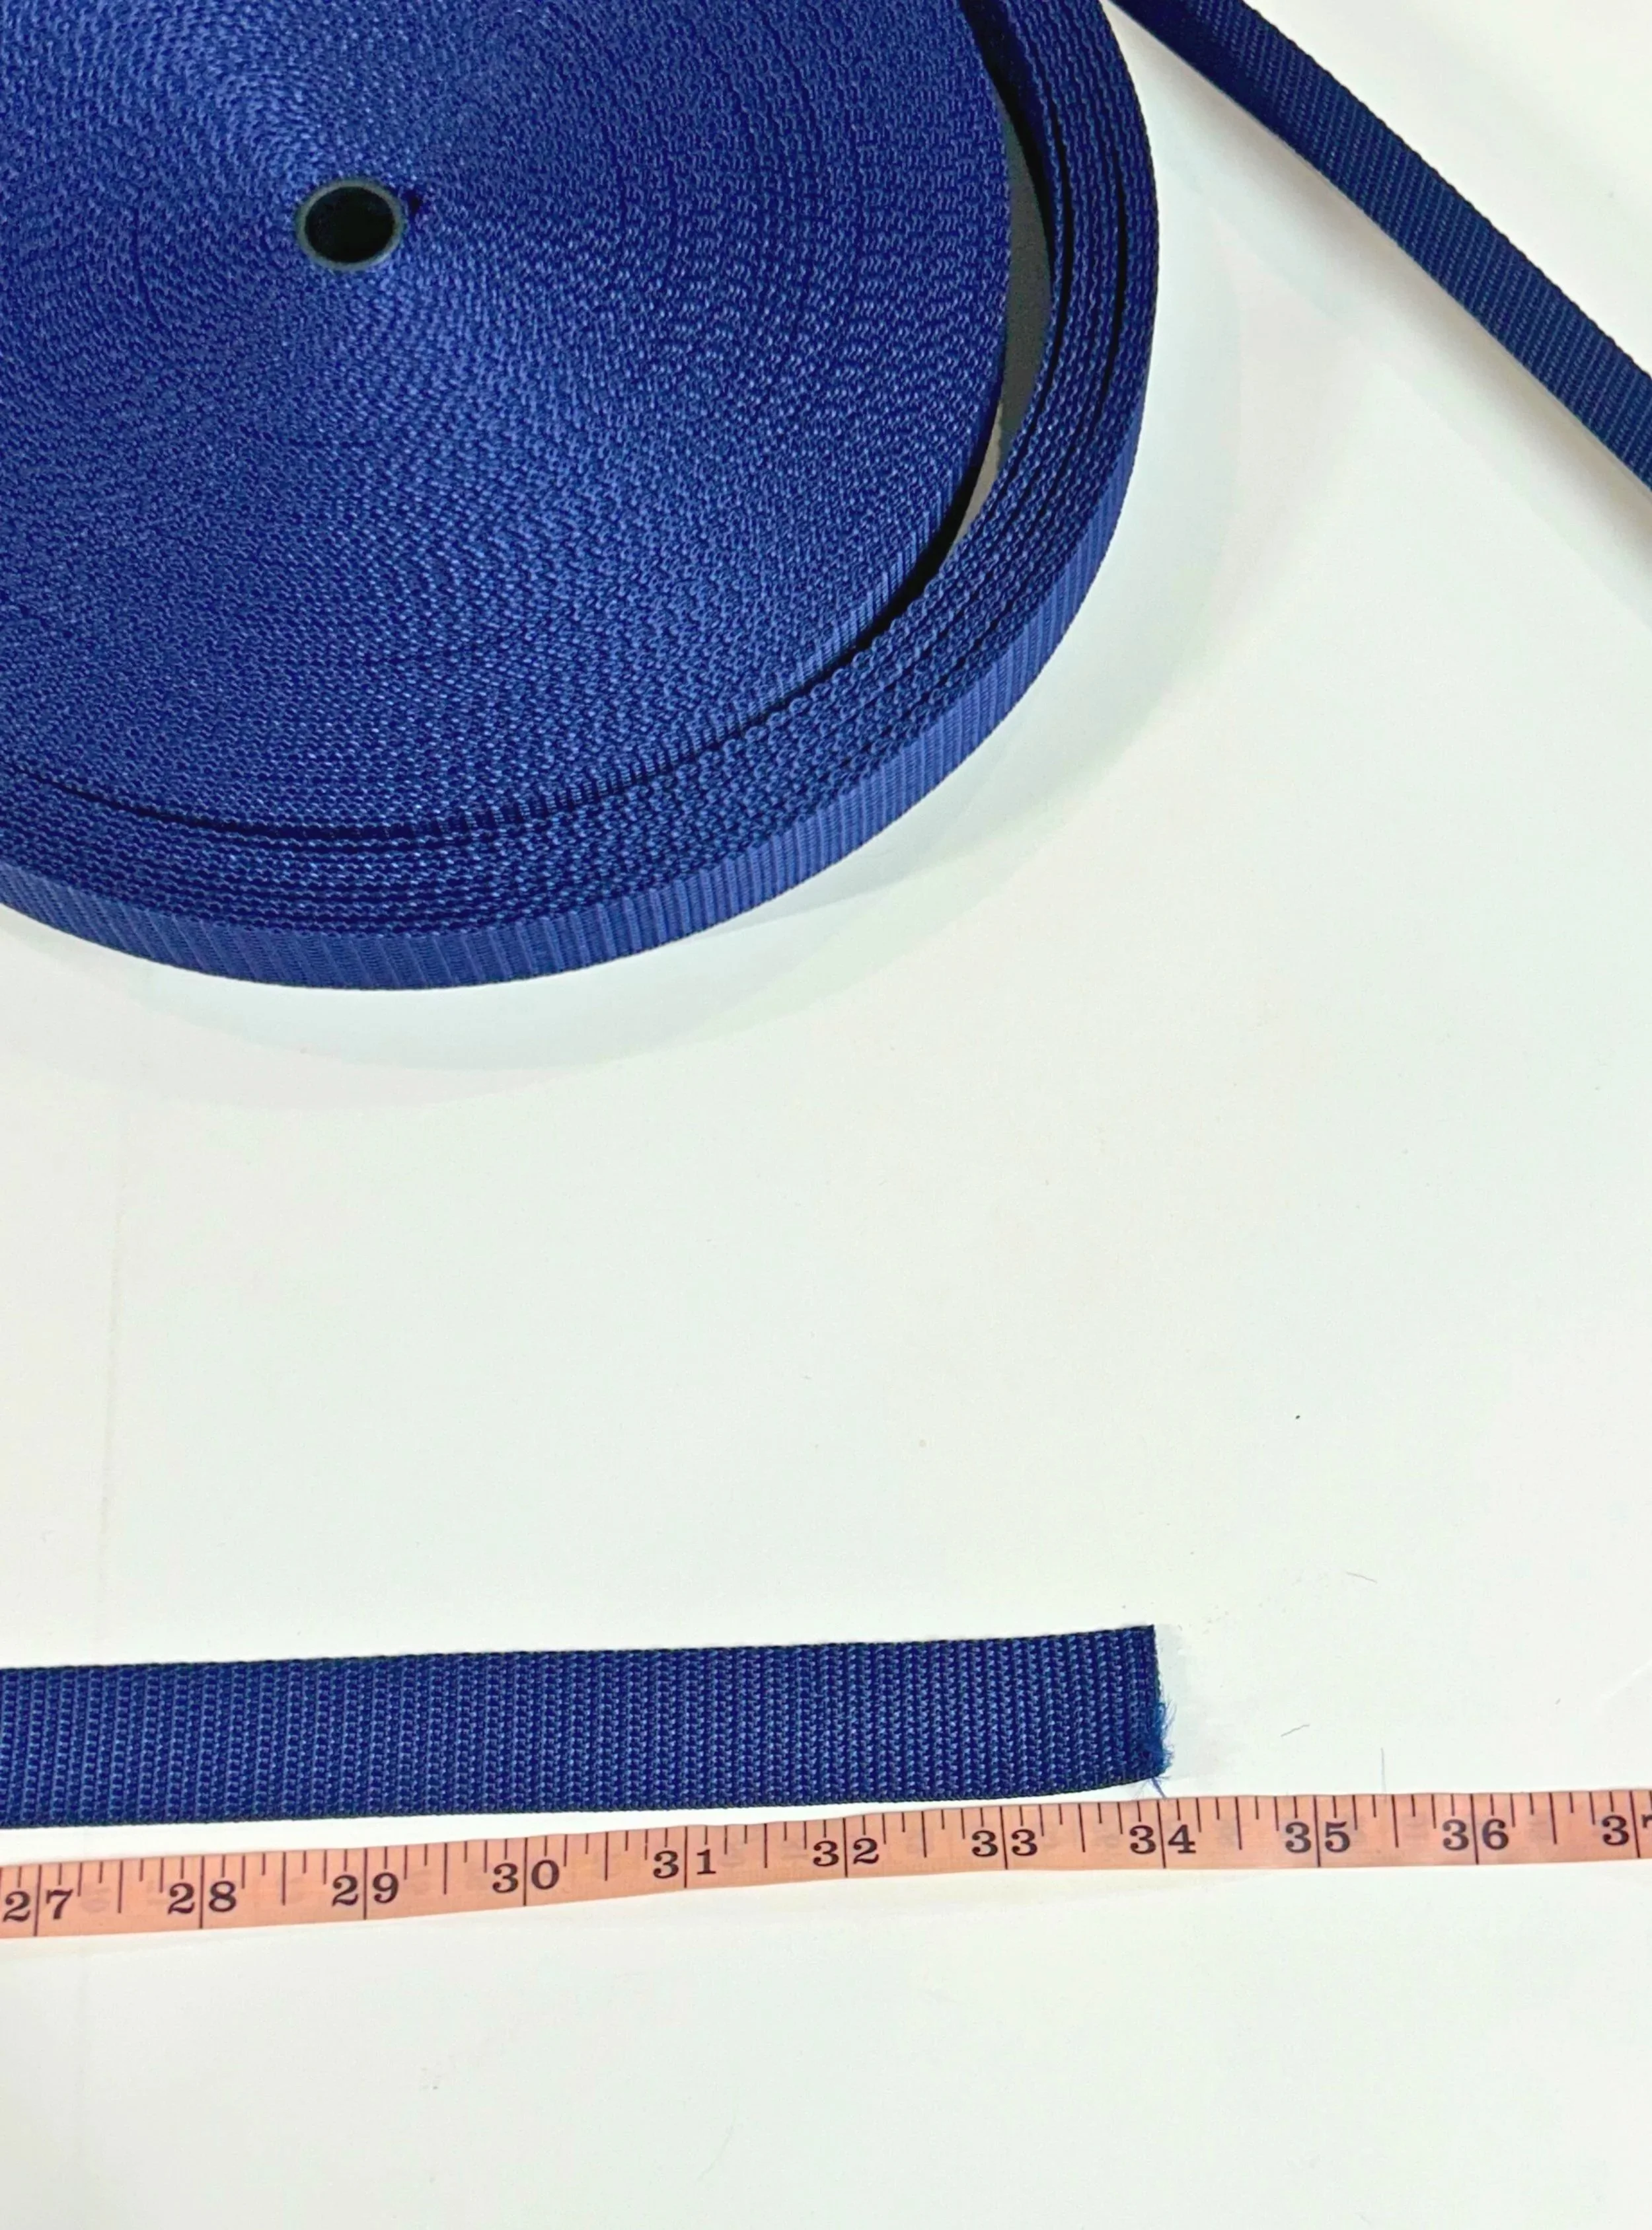
Cut the webbing 34” long
You can seal the webbing ends with a lighter.

It’s time to work on the lunch bag closure!
Step 1: fold the webbing in half and mark the half point
Step 2: slide one side of the parachut buckle through the webbing and lining up to the marked line.
Step 3: stitch. Use a zipper foot, so you can stitch as close as possible.

Measure from the stitch line 2.5” and mark a line

Place the marked line on the side seam. Pin in place for now.

Pin the webbing along the top edge of the lunch bag.

Stitch the webbing in place.

Stitch the webbing as in the diagram.
Repeat the same for the other side.

Final step!
Step 1: insert the other half of the bucklet through the webbing.
Step 2: join the 2 webbing ends together
Step 3: Secure the buckle by stitch as clsoe as possible.
And you are done! We would love to see your finsihed lunch bag. Feel free to share your work with us by tagging us on instagram @sewbeitstudio
